QR labels
Cobblr prints QR labels for your items and locations. Scan a label later and it takes you straight to that thing in Cobblr, so a bin, a machine, or a shelf is one scan away from its record.
To print a batch:
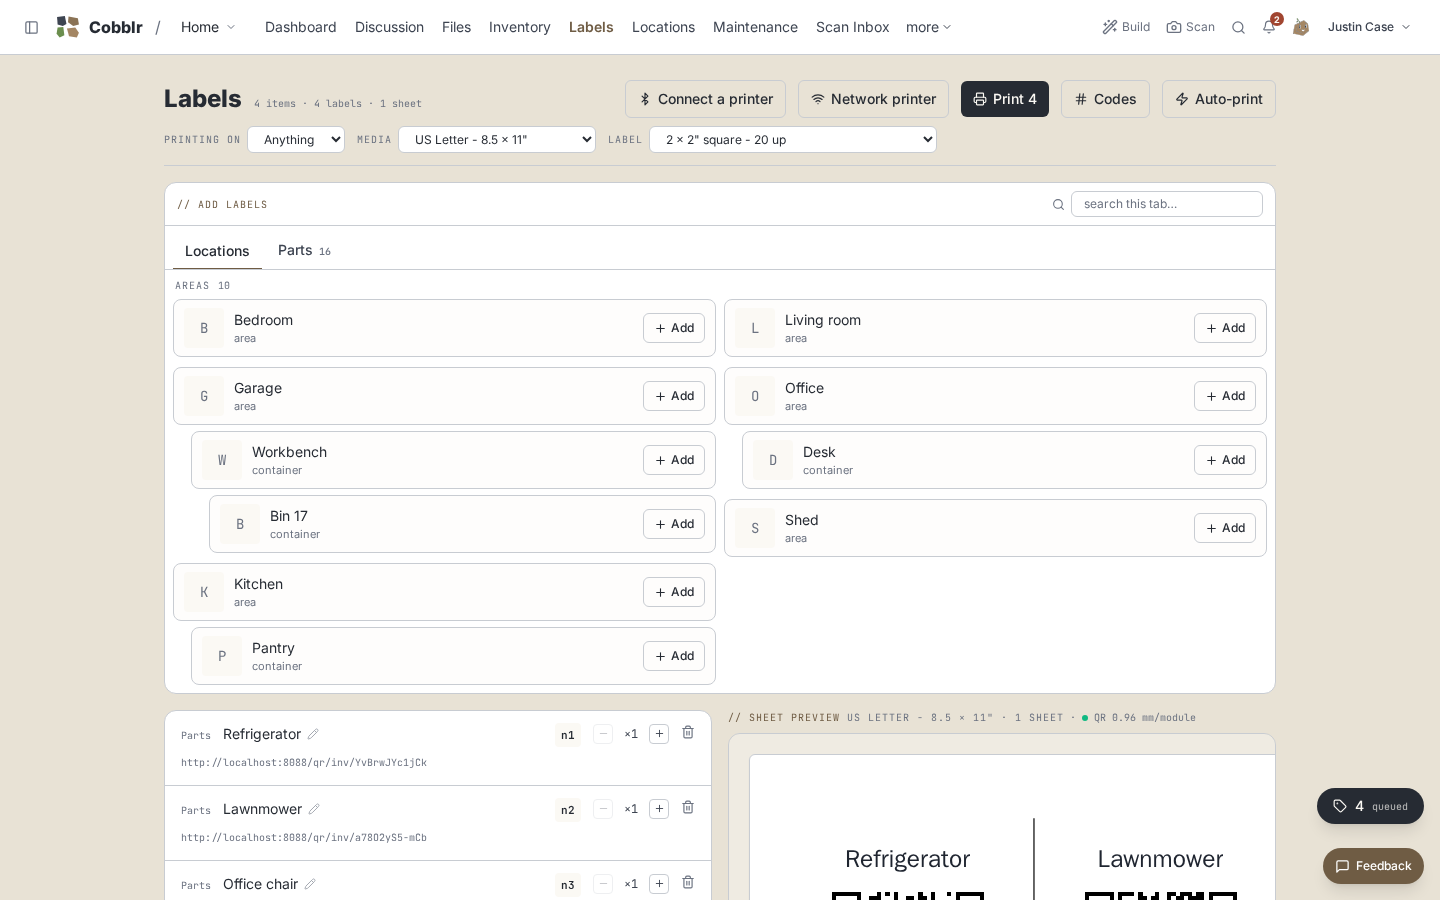
- On the Labels page, pick the target at the top of the toolbar: a saved printer, or System print for your computer's own print dialog.
- Queue labels from the Add labels panel (a tab per collection, one-tap Add).
- Pick a size. You only ever see sizes that fit the target.
- Check the live preview, then Print, Send to printer, or Print to your Bluetooth printer.
- Confirm the output looks right (Mark printed or Mark batch printed) and the queue clears.
Choosing the target
The link inside a label is baked in at print time, and by default it carries the address you're using right now. Trying things out, or only ever printing a handful? Not a big deal. Reprinting a few labels is nothing. About to label a hundred bins? Read QR label URLs first and pick an address that will survive your setup changing: a few minutes setting it up now beats peeling and re-stickering every bin later.
- The target selector at the top of the toolbar shows the printer this run prints to. Switch it to any other saved printer or to System print, your computer's own print dialog.
- Switching targets never forgets a printer. Forgetting one is a separate, confirmed choice in the same menu.
- No printer at all? The toolbar prompts you to connect one, and System print still works, so a fresh workspace is never stuck.
- Each saved printer shows what it last reported: its loaded roll and, if it has one, its battery.
- A Bluetooth printer's quick settings open from the same menu: its name, how the print sits on the label (nudge it up or down if it prints too low), and how dark it burns. Label size is not among them, because it comes from the page's own size picker and so can never disagree with what prints.
- Bluetooth printers are not on your network at all, so they work a little differently. See Bluetooth label printers.
Queueing labels
- Add labels shows a tab per collection you can actually label (your own lists, machines, locations), each item with a one-tap Add. The Locations tab is the same areas-and-bins tree you navigate everywhere else, and the tab you were last on is remembered across a refresh.
- Every queued row shows what it is, the full URL its code will resolve to, and plus and minus buttons for how many copies to print.
- Click a row's name to rename it, so "Rolling 3-Drawer Workshop Tool Cabinet" becomes a short caption that fits the label and keeps the QR large. One tap puts the full system name back.
Picking a size
- The size options follow the target. A 2 inch Bluetooth roll printer offers just the rolls it can feed, an inkjet or laser just sheets, and System print the whole library.
- Two groups everywhere: Label rolls (a thermal or die-cut roll like 4 × 6 inch or 50 × 30 mm) and Sheets (a full page like US Letter or an Avery layout). Common metric roll sizes are built in, so a 50 × 30 mm roll is one pick, one-up or two-up, with nothing to measure.
- printing on appears when no printer is connected and you print through your own dialog. Say whether you are on a roll or a sheet and the list narrows down to, say, that 50 × 30 roll.
- as loaded marks the size matching the roll your printer reports. If your pick disagrees, a one-click note switches you to the roll the printer says it has.
- Tile smaller labels on a 4 × 6 roll and cut them apart with scissors: 2 × 2 inch squares six at a time, 1½ inch squares eight at a time, and several sizes between. The cheap route if you already stock shipping labels.
- New label size in the size list takes the media and the label measurement in inches or millimeters (a toggle switches between the two), and Cobblr works out how many fit.
- Recently used sizes and printers sit at the top of their lists.
Turning a wide label
- A wide label like a 50 × 30 mm roll turns a quarter turn by default, so it reads upright, standing on its end, with the name above the QR.
- A turn toggle beside the size pickers lets you decide for yourself, and the preview shows exactly how the label will sit. The stock itself is unchanged. Only the layout turns.
- The turn applies to the preview and to your browser's print dialog. To change what a Bluetooth or network printer prints, change the label size set up on the printer instead.
Why the turn helps, and why printers ignore the toggle
Above the QR, the name gets the label's full width rather than the strip left over beside the QR. On a 50 × 30 that is 30 mm of room instead of 20, the difference between a readable name and one wrapping to a few letters a line. A Bluetooth or network printer arranges each label from the dimensions configured on the printer itself, so it already stacks the name above the QR when that face is taller than it is wide.
The preview
- The preview is live. It always reflects your current QR settings, so changing the label base URL updates it without re-queueing anything. The address is only baked in when you print.
- A run that spans more than one sheet previews as a strip of per-sheet thumbnails, so it looks like what comes off the printer.
- Actual size shows a label at its true physical size on screen. Drag the little ruler once to calibrate your display.
- The preview reads out how large each QR actually prints, turning amber then red when a code is too small for a phone to scan, so you catch it before you commit a sheet.
Printing
- Print hands the batch to your browser's print dialog right on the page, no new tab.
- Send to printer goes to a printer you've configured. If a network send fails it offers a reprint.
- Print to your Bluetooth printer sends the whole queue over one connection, so it asks for the device just once rather than once per label.
- Print and Send hold the labels until you confirm the output looks right (Mark printed in the browser flow, Mark batch printed on a network send), so cancelling the dialog, a jam, or a wrong size doesn't quietly burn the batch.
- A Bluetooth print clears on its own, since it knows the result the moment the labels are out. If one didn't come out right, the confirmation offers Return to queue, which puts those labels back (reusing their codes) so you can fix the size and try again.
- Cobblr keeps a history of what you've printed.
The Live box
If your printers connect through a bridge running on your computer, a Live box lets you watch them from any page: a pill at the bottom-right, or a row in the sidebar foot.
- It shows whether each printer is connected, idle, or printing, its loaded roll and battery, and buttons to connect, disconnect, or check what it has loaded.
- While a batch streams out, the printer icon carries a count of the labels still to print, the way a taskbar shows a job.
- It is Cobblr's general live-activity surface, so auto-print and other live modes use it too. With no bridge and nothing live running, it does not appear.
The code printed in the middle
Every label also carries a short code in the center of its QR, something like
m1, p42 or b7.
- Scanning is still how you open a record. The code is for a human standing in front of the label: tell two identical bins apart at a glance, point at one across the room, or say "it's in b7" to someone else without either of you touching a phone.
- A code is a prefix plus a number. Each list of things owns its own prefix
and its own count, which keeps codes short while unique across the
workspace, so
m1can only be one thing. - To type a code in (the sensible move on a desktop with no scanner to hand), use the Codes button on the Labels page, not the main search box. Search looks through your records' text and knows nothing about codes.
- Code lookup forgives case and the letters that get misread as digits (
oand0,land1), so a code you squinted at across a room still finds its item and takes you to it. - A prefix stays freely editable until you actually print a label with it. Then it locks, since a sticker already on a shelf carries that code, and the list's row shows the locked prefix with a small lock instead of an edit box.
Managing codes
The Codes button on the Labels page opens a panel that groups your code lists under their kind (Machines, Locations) by their real names.
- Every list you could label shows here from the start with a suggested prefix, before you print anything. Keep it, change it, or clear it to give that list no code at all (freeing its letter for another list).
- Save locks a suggestion in. Leave one alone and your first label just adopts it.
- Find an item by its code, for each list.
- Toggle whether the code prints inside the QR, per list, so your 3D Printers can show the code while your CNC hides it even though both are machines. Locations start with it off, since a room's name already tells you which one it is. Parts and machines start on.
- Ask Cobb to make any of these changes for you.
Scan to jump
Each label's QR is tied to one item or location. Scanning it opens that record, or runs an action on it. Stick a label on a bin and you never search for it again: scan, and you're there.
Filing by scanning
Location labels also drive putting things away. The scans funnel down the location tree:
- Scan a room's label and you're working in that room.
- Scan a container's label and the container is filed there and becomes where the session is aimed.
- Scan an item's barcode and it is captured already stamped with that container.
- Confirm the session in the inbox. Each item arrives with its location already set.
The scanner itself never files anything, so nothing lands in your workspace until you confirm. Label your rooms and bins once, and tidying is a series of scans plus one confirmation instead of a series of forms.
Labels from another tool
Already have QR labels printed by a previous system (Homebox, or anything else that printed URLs)? You don't have to reprint them.
- Under Configuration → Scan rules, teach the scanner the foreign format once, and every old sticker then resolves to the matching record here. Editing rules takes an admin.
- The simplest rule takes the old system's base URL plus its path layout:
declare the host once and map its path segments to kinds (
/parts/to Parts,/locations/to Locations). A label likeold.host/parts/4then opens the item whose field holds that id. - Paste a value into the Test a payload box to see what it resolves to before you trust a rule.
- A URL prefix for a single kind, a regex, or a bare number also work.
- Rules run in order, first match wins, and each has its own on and off switch.
- With no rules, nothing changes. An unmatched scan flows through the normal identify routine.
Labels pair naturally with locations (label your shelves and bins) and with inventory (label the parts themselves).